Introduction:
Windows SharePoint Services initially comes with very
minimal search capabilities. It do not have advanced search capabilities like
MOSS have. The Search Server Express 2008 is an Add on to WSS to avail the
advanced search capabilities to WSS such as
-
Search by Metadata
-
Search by File Type
-
Defining Best Bets
-
Creating Search Scopes
Installation:
-
Download Search Server 2008 Express from the
Microsoft Office Enterprise Search Web site. For 32 bit go to http://www.microsoft.com/en-us/download/details.aspx?id=17911
For 64 bit go to http://www.microsoft.com/en-us/download/details.aspx?id=6666
-
Navigate to and run the downloaded file,
SearchServerExpress.exe, which is a self-extracting file. The file automatically
uncompressed and the Search Server Express installation start screen appears.
-
On the Search Server installation Start
screen, under Install, click Install Search Server
-
On the Read the Microsoft Software License Terms screen, review the terms, select
the I accept terms of agreement check
box, and then click continue.
-
Continue the installation by using one of the
following procedures to install Search Server over Windows SharePoint Services
3.0 SP1
-
To upgrade an Advanced installation of
Windows SharePoint Services SP1
-
On the server type screen, click one of the
following:
·
Complete
Installs
the application server role and the Web front-end (WFE) server role. We
recommend choosing this option under either of the following conditions:
a)
This is the first server in your Search
Server deployment
b)
You want to configure this computer as
an application server for the Search Server 2008 farm that you are creating
with this upgrade.
·
Web Front End Installs only the WFE server
role.
-
On the Server
Type screen:
Optional: in the File Location tab, change the installation path or the location for
content index files.
Optional:
In
the Feedback tab, specify whether
you want to participate in the Customer Experience Improvement Program.
-
On the Server
Type screen, change the installation folder if required, and then click Install Now..(For example if the installation folder shows
c:\Program files\Microsoft office server then change to d:\Program
files\Microsoft office server. The Installation
Progress screen appears. This phase of the installation takes several
minutes to complete.
-
On the next screen, which prompts you to
complete the configuration:
a) Ensue
that the Run the SharePoint Products and
Technologies Configuration Wizard now check box is selected.
b) Click
Close to start the Configuration
Wizard.
-
On the Welcome to SharePoint Products and
Technologies screen, click Next
-
In the dialog box that notifies you that some
services might be restarted or reset during configuration, click Yes.
-
On the Completing the SharePoint Products and
Technologies Configuration Wizard screen, click Next.
-
On the Configuration Successful screen, click
finish.
-
If this is first server in your Windows
SharePoint Services farm that you are upgrading to Search Server, a Web browser
opens the Search Server Configuration page. You complete this page only once
for any Search Server farm.
To complete Search Server Configuration
page required settings
1) In the Default Account For Services
section, type the user name and password for the default services account.
2) In the Search Center Account section,
type the user name and password for the account for the application pool
identity of the default Search Center site.
3) In the Search Contact E-mail section,
type the e-mail address of a person in your organization.
4) If you do not need to configure any
of the settings in the Optional section of the Search
Refer to the below screen captures for
reference
Server Configuration page:
a) Click OK.
b) The Operation in Progress page
displays the progress of starting services, creating
shared services provider, and creating the Web applications and sites
for Central
administration, Search Administration, and the default Search Center
site.
c) This
configuration takes several minutes. Your Advanced installation and
configuration is now complete.
d) On
the Search Server Configuration is Complete screen, click OK. A Web browser
opens the Welcome to Microsoft Search Server 2008 page, which provides guidance
for configuring your Search Server installation.
On the Welcome to Microsoft Search
Server 2008 page, follow the instructions to do the following:
i. Open the Search Administration Web
site to configure and monitor Search Server.
ii. Begin crawling content to build a
content index.
iii. Open the Search Center site to try
a search.
Post Installation
Steps:
-
Create a root site for the newly created web
application for search center. It should be of type “Search Center”.
-
After this installation is complete in the
web.config files check for the “Report Viewer Web part” entries at the Safe
Control List and try commenting those. Since this report Viewer web part is not
a part of the installer but logging those entries which is not required at all.
In fact, these entries cause the error while opening the Central Administration
page.
-
Check the feature for the web applications and
there, the Office Server Enterprise Search and Office Server Site Search must
be activated.
Check:
-
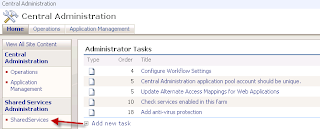
Open the Central Administration page from the
server and on the quick launch there is a SSP created only for the search
service. Once clicked on the SSP link it opens the Search Administration Page.


